
I love summer dinners. I love being able to throw some protein on the grill, make a quick salad and call it a night. I love the smell of the fire pit and dinners outside as the sun sets. I love fresh, light meals with fresh veggies and big flavors and this Italian Pasta Salad…
recipe
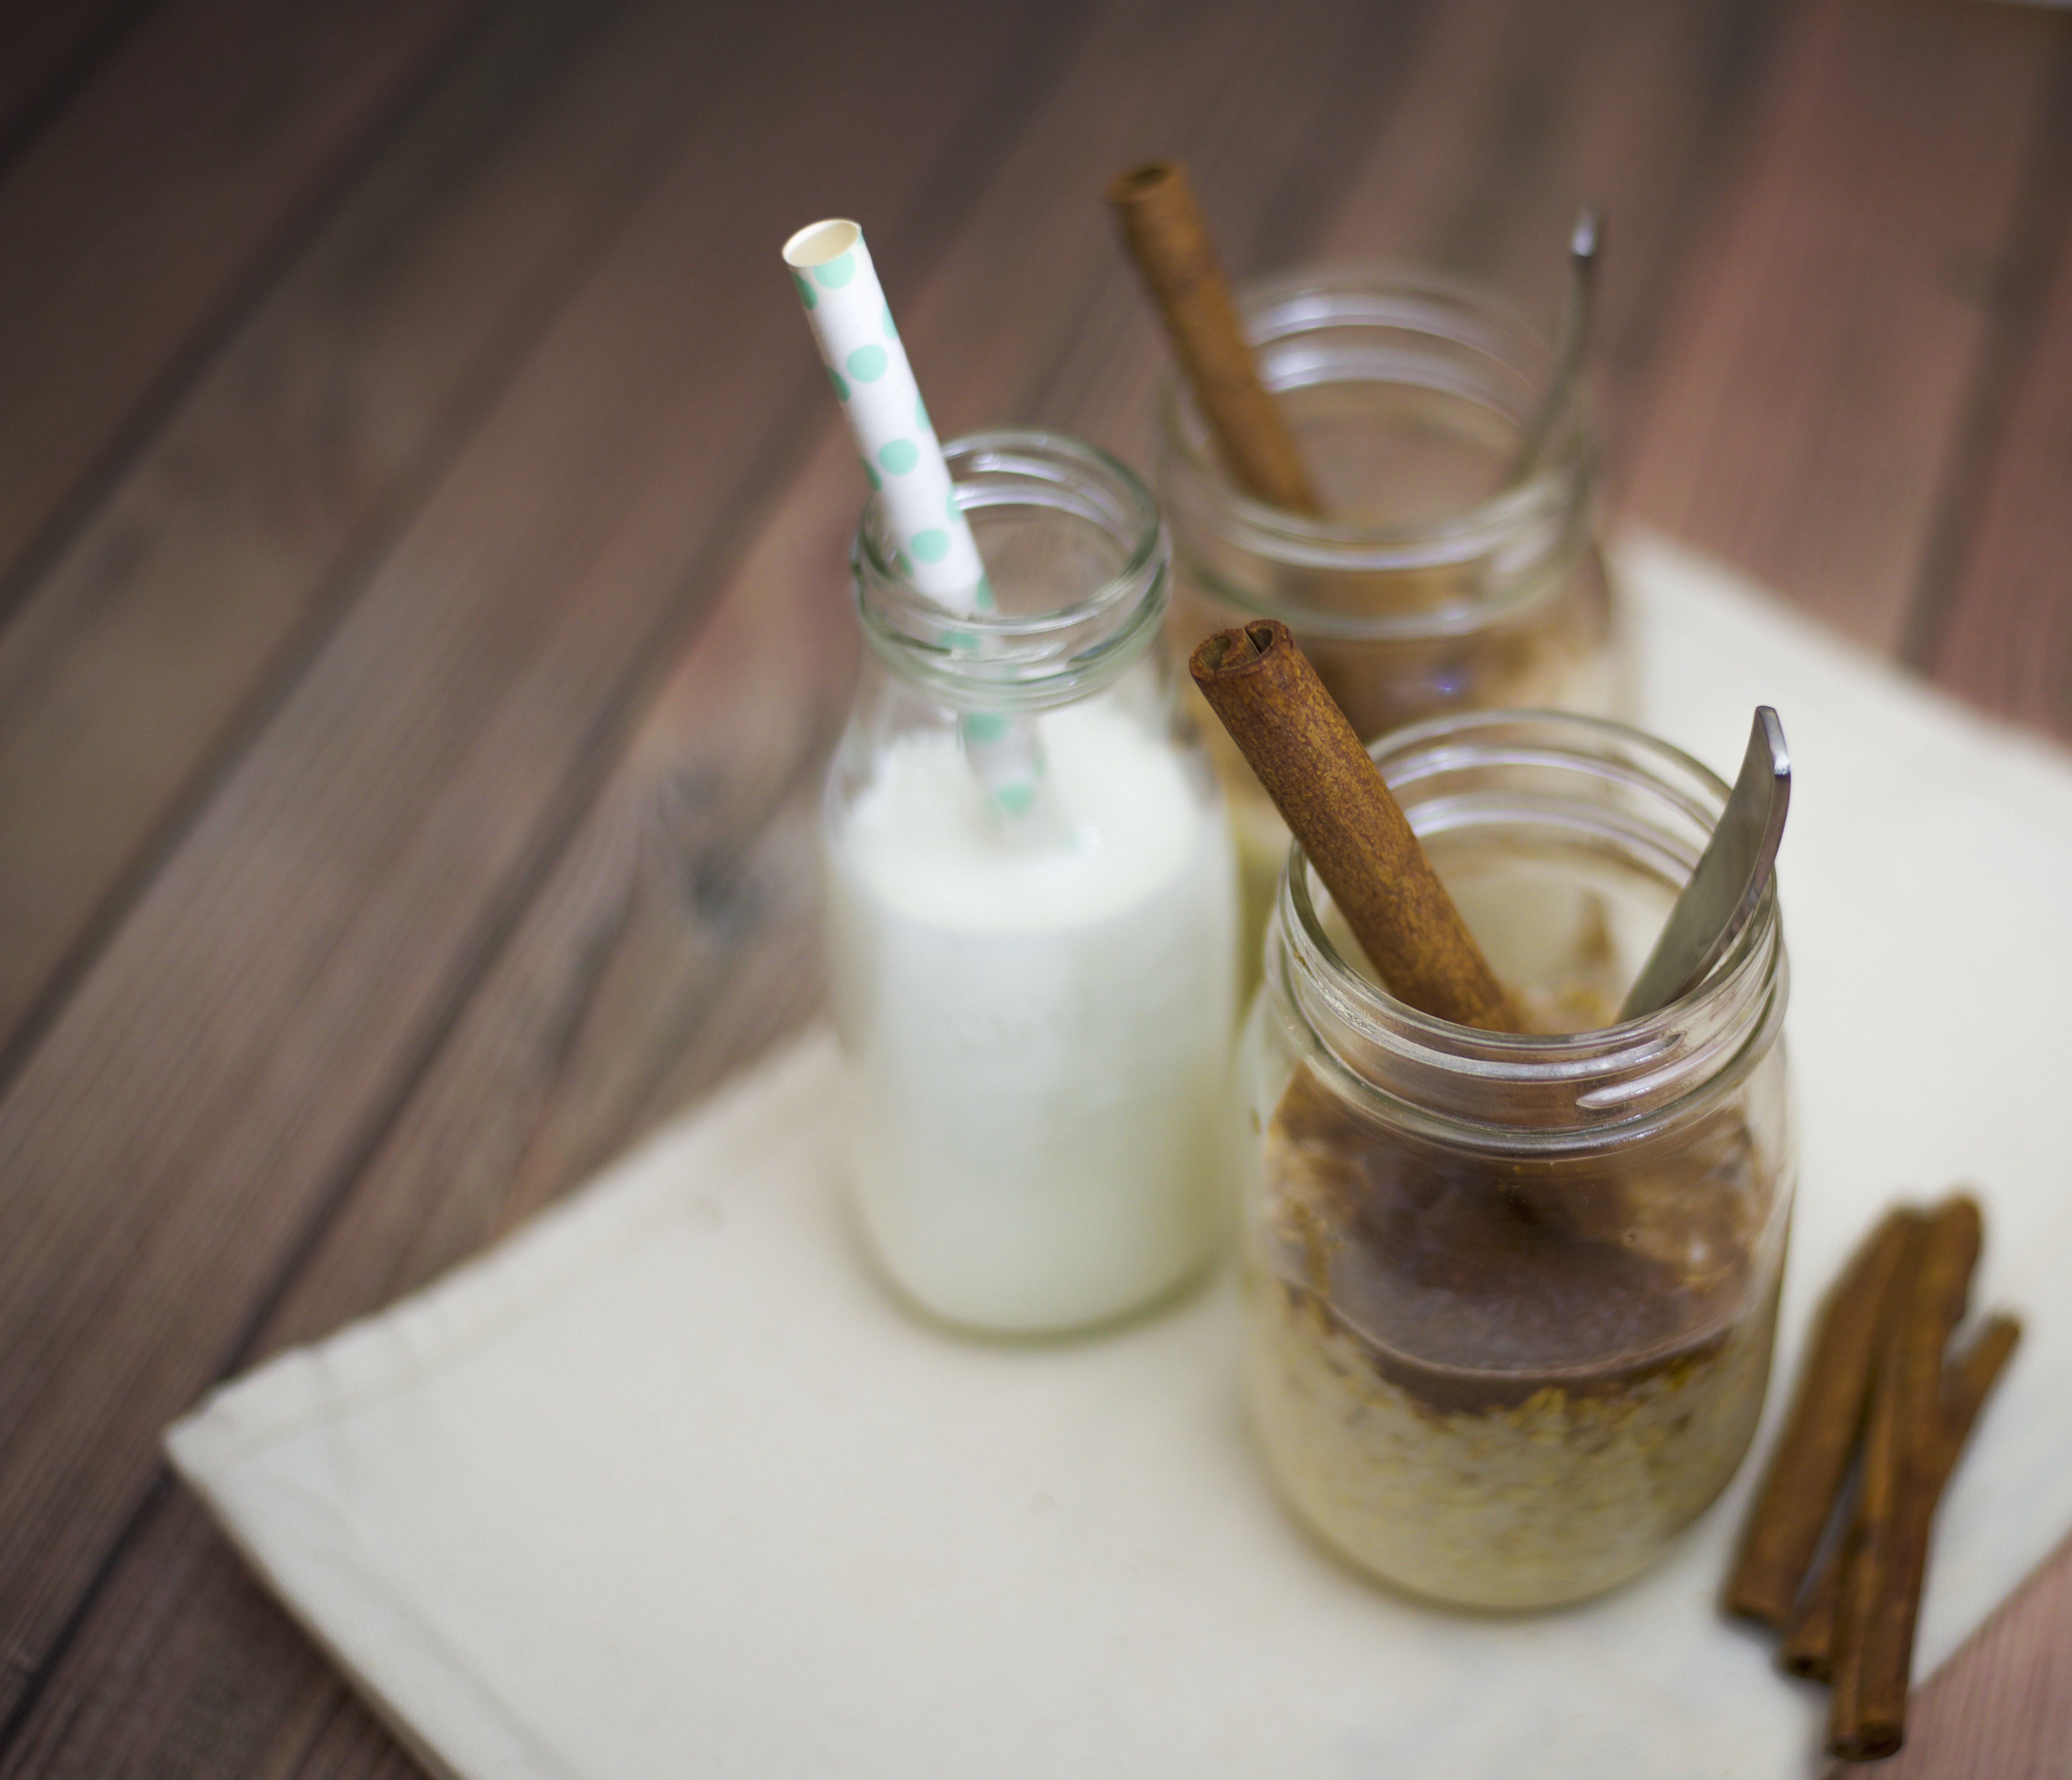
Maple & Brown Sugar Overnight Oats
Around here, mornings are hectic. Between getting myself and the little man ready and out the door [all before 7:30AM] there is little time to make breakfast. Overnight oats are a breakfast staple because I make them ahead of time and can even eat them in the car or at my desk at work. There…
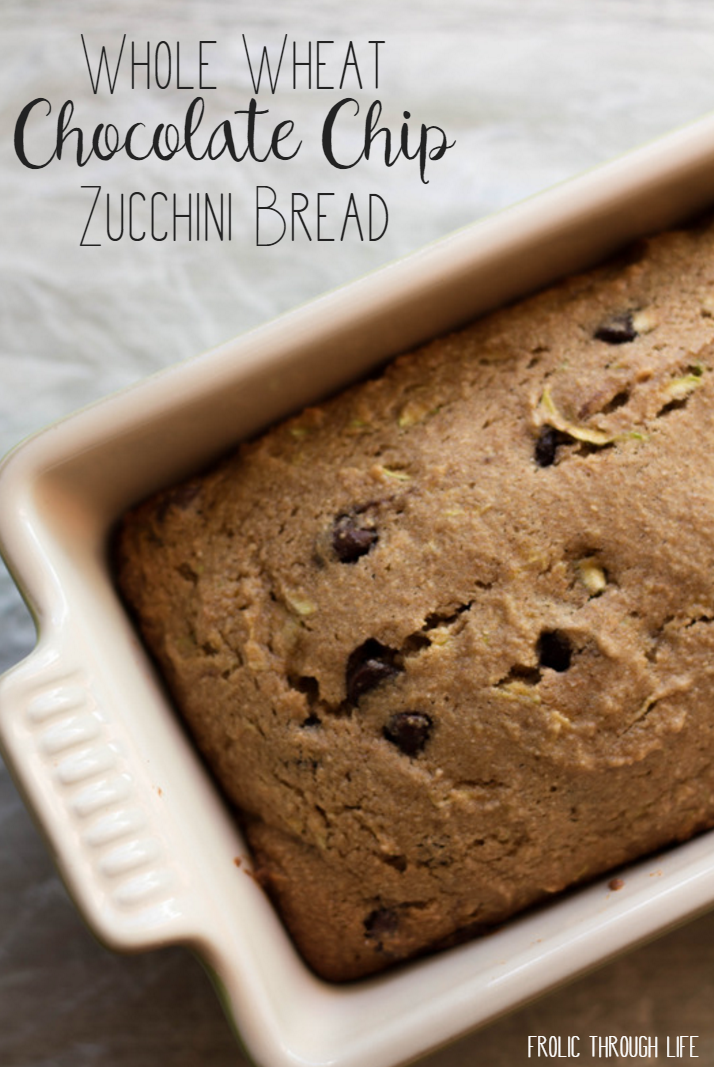
Whole Wheat Chocolate Chip Zucchini Bread
It’s official. We are in the zucchini overload phase, but I don’t mind it one bit. I can eat zucchini with every meal for weeks, but since not everyone wants some form of zucchini for dinner everyday, I decided to try to use up some of our zucchini stash in a different way. Enter whole wheat…
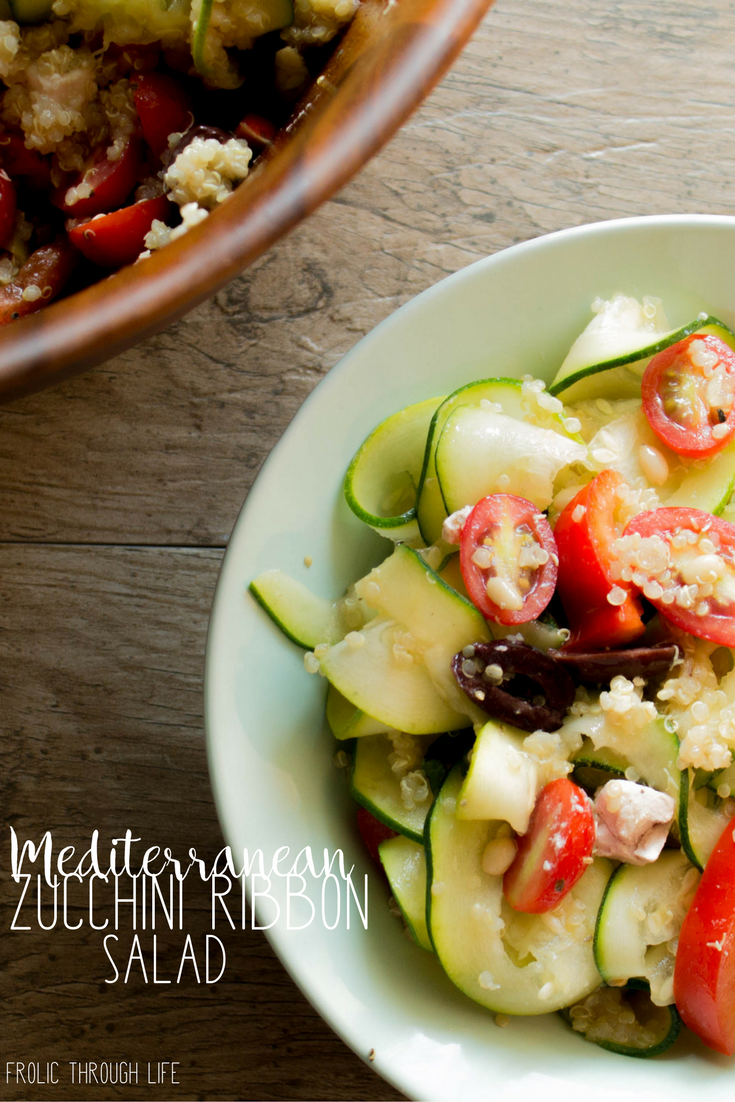
Mediterranean Zucchini Ribbon Salad
One of my favorite things about late summer is zucchini. It’s fresh, it’s cheap and it is everywhere! One of my favorite things to do with zucchini is make zoodles, but this time I used my spiralizer to make zucchini ribbons and turned them into this refreshing summer salad. If you are a fan of Greek…
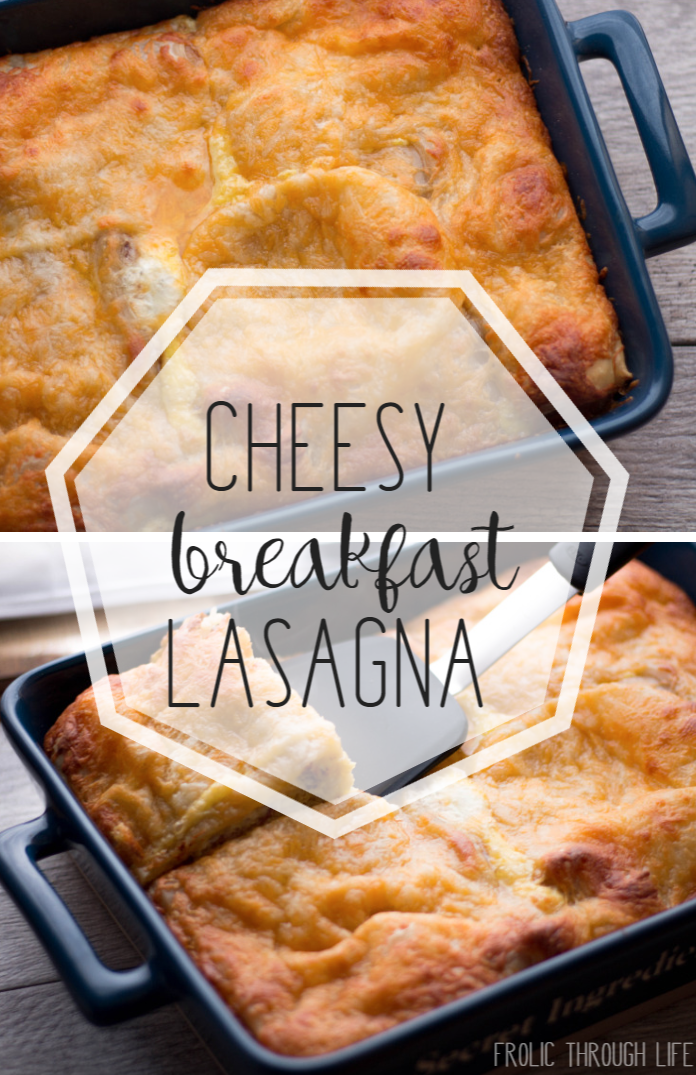
Cheesy Breakfast Lasagna
At our house, family breakfast is a big deal. We all run on different schedules, so the only time all three of us are able to sit down for breakfast together is on the weekends or holidays. When we do get the chance to have breakfast together, we try to make it special and something…
